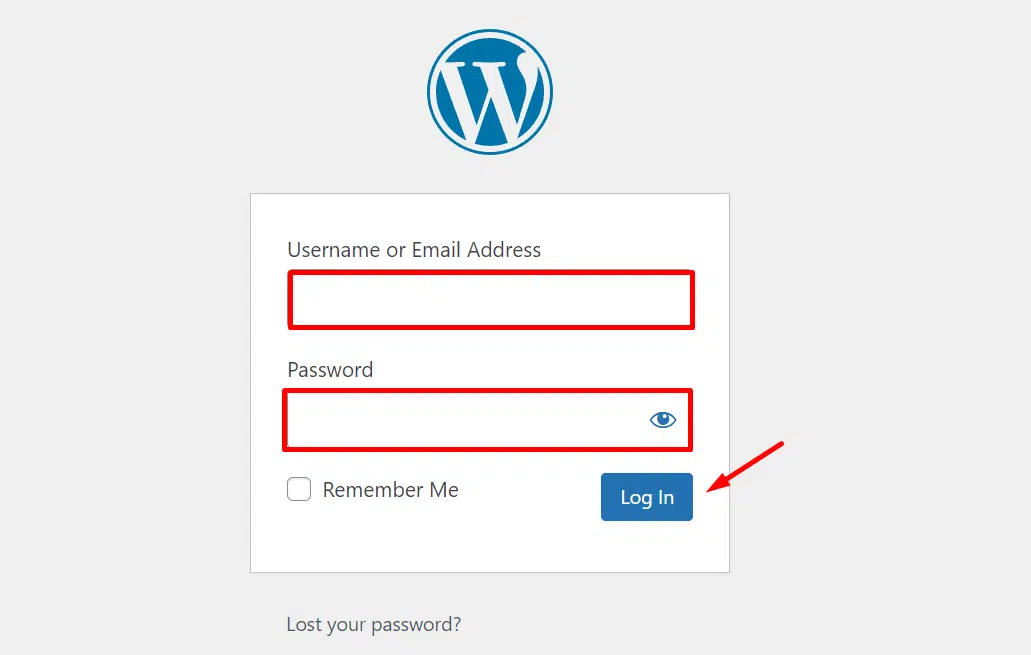
To get started, log in to your WordPress dashboard. This is typically accessed by adding “/wp-admin” or “/manage” to the end of your website’s URL (e.g., www.yourwebsite.com/wp-admin). Enter your login credentials to access the dashboard.
Once you’re logged in, you’ll be taken to the WordPress dashboard. On the left-hand side, you’ll see a menu. Look for the “Posts” option and click on it. This will take you to the Blog Posts section and click “Add new post”.
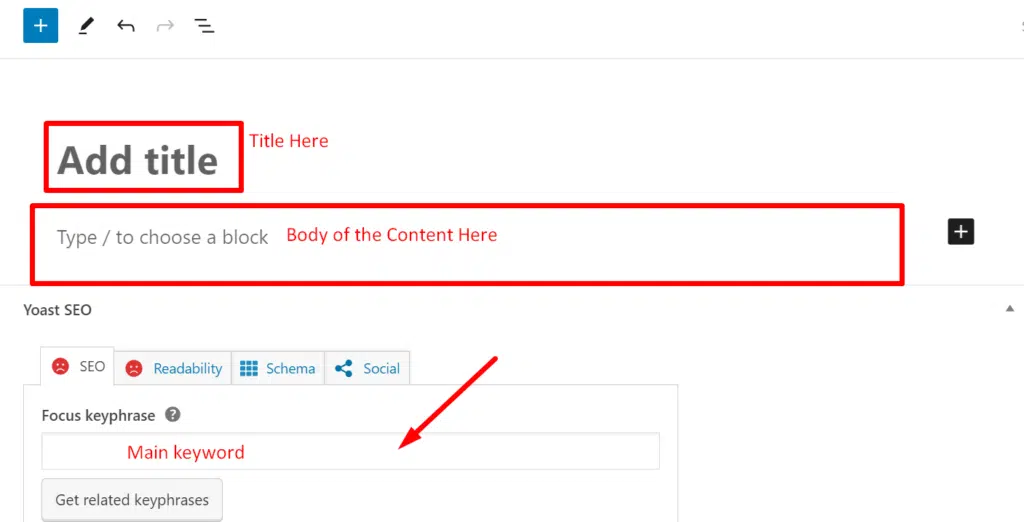
On the Add New Post screen, you’ll see spaces to enter the title and content of your blog post. Start by entering a descriptive and engaging title for your blog post in the designated field.
Add Title
Add the Body of the Content including images and videos
Add the Keywords
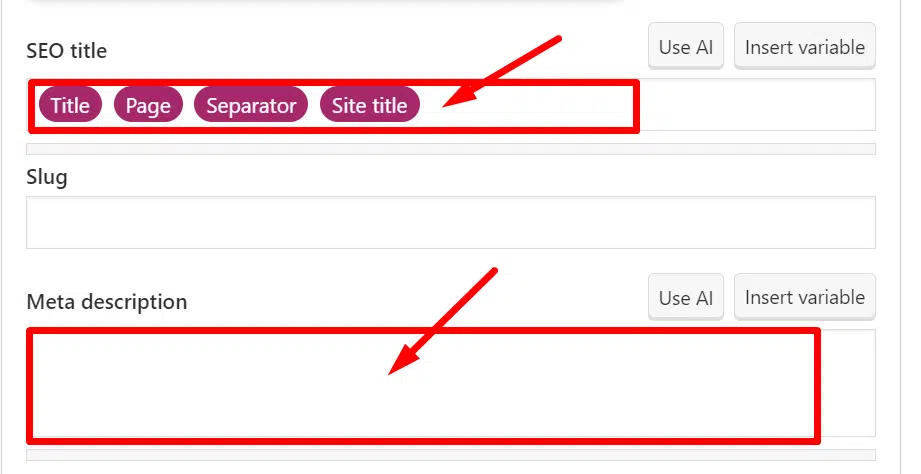
Add SEO Title and Meta Description
Add featured Image
Check and add the permalink (URL of the blog post)
If you’re satisfied with the outcome, click on the “Publish” button to make your blog post live on your website. You can also choose to save your blog post as a draft if you want to work on it further before publishing.