Connecting to MDR VPN
Introduction
A Virtual Private Network (VPN) allows you to traverse untrusted networks as if you were on a private network. It gives you the freedom to access the internet safely and securely from your smartphone or laptop when connected to an untrusted network, like the WiFi at a hotel or coffee shop.
When combined with HTTPS connections, this setup allows you to secure your wireless logins and transactions. You can circumvent geographical restrictions and censorship, and shield your location and any unencrypted HTTP traffic from untrusted networks.
Installing the Client Configuration
This section covers how to install a client VPN profile on Windows and macOS. None of these client instructions are dependent on one another, so feel free to skip to whichever is applicable to your device.
The OpenVPN connection will have the same name as whatever the .ovpn file you have received is named, it could be client1.ovpn, or client2.ovpn and so on. In regards to this tutorial, the connection file is named client1.ovpn.
macOS
Download the connection file
Your connection file is available via MDR Google Drive link you have received by email or via slack in a private message. Download the zip file, uncompress and save it in the local folder you prefer. This .ovpn file is the client certificate you need for connecting to the VPN in the next steps.
Installing
Tunnelblick is a free, open source OpenVPN client for macOS. You can download the latest disk image from the Tunnelblick Downloads page. Double-click the downloaded .dmg file and follow the prompts to install.
Towards the end of the installation process, Tunnelblick will ask if you have any configuration files. Answer I have configuration files and let Tunnelblick finish. Open a Finder window and double-click client1.ovpn. Tunnelblick will install the client profile. Administrative privileges are required.
Connecting
Launch Tunnelblick by double-clicking the Tunnelblick icon in the Applications folder. Once Tunnelblick has been launched, there will be a Tunnelblick icon in the menu bar at the top right of the screen for controlling connections. Click on the icon, and then the VPN Details… to check some settings options as follows:
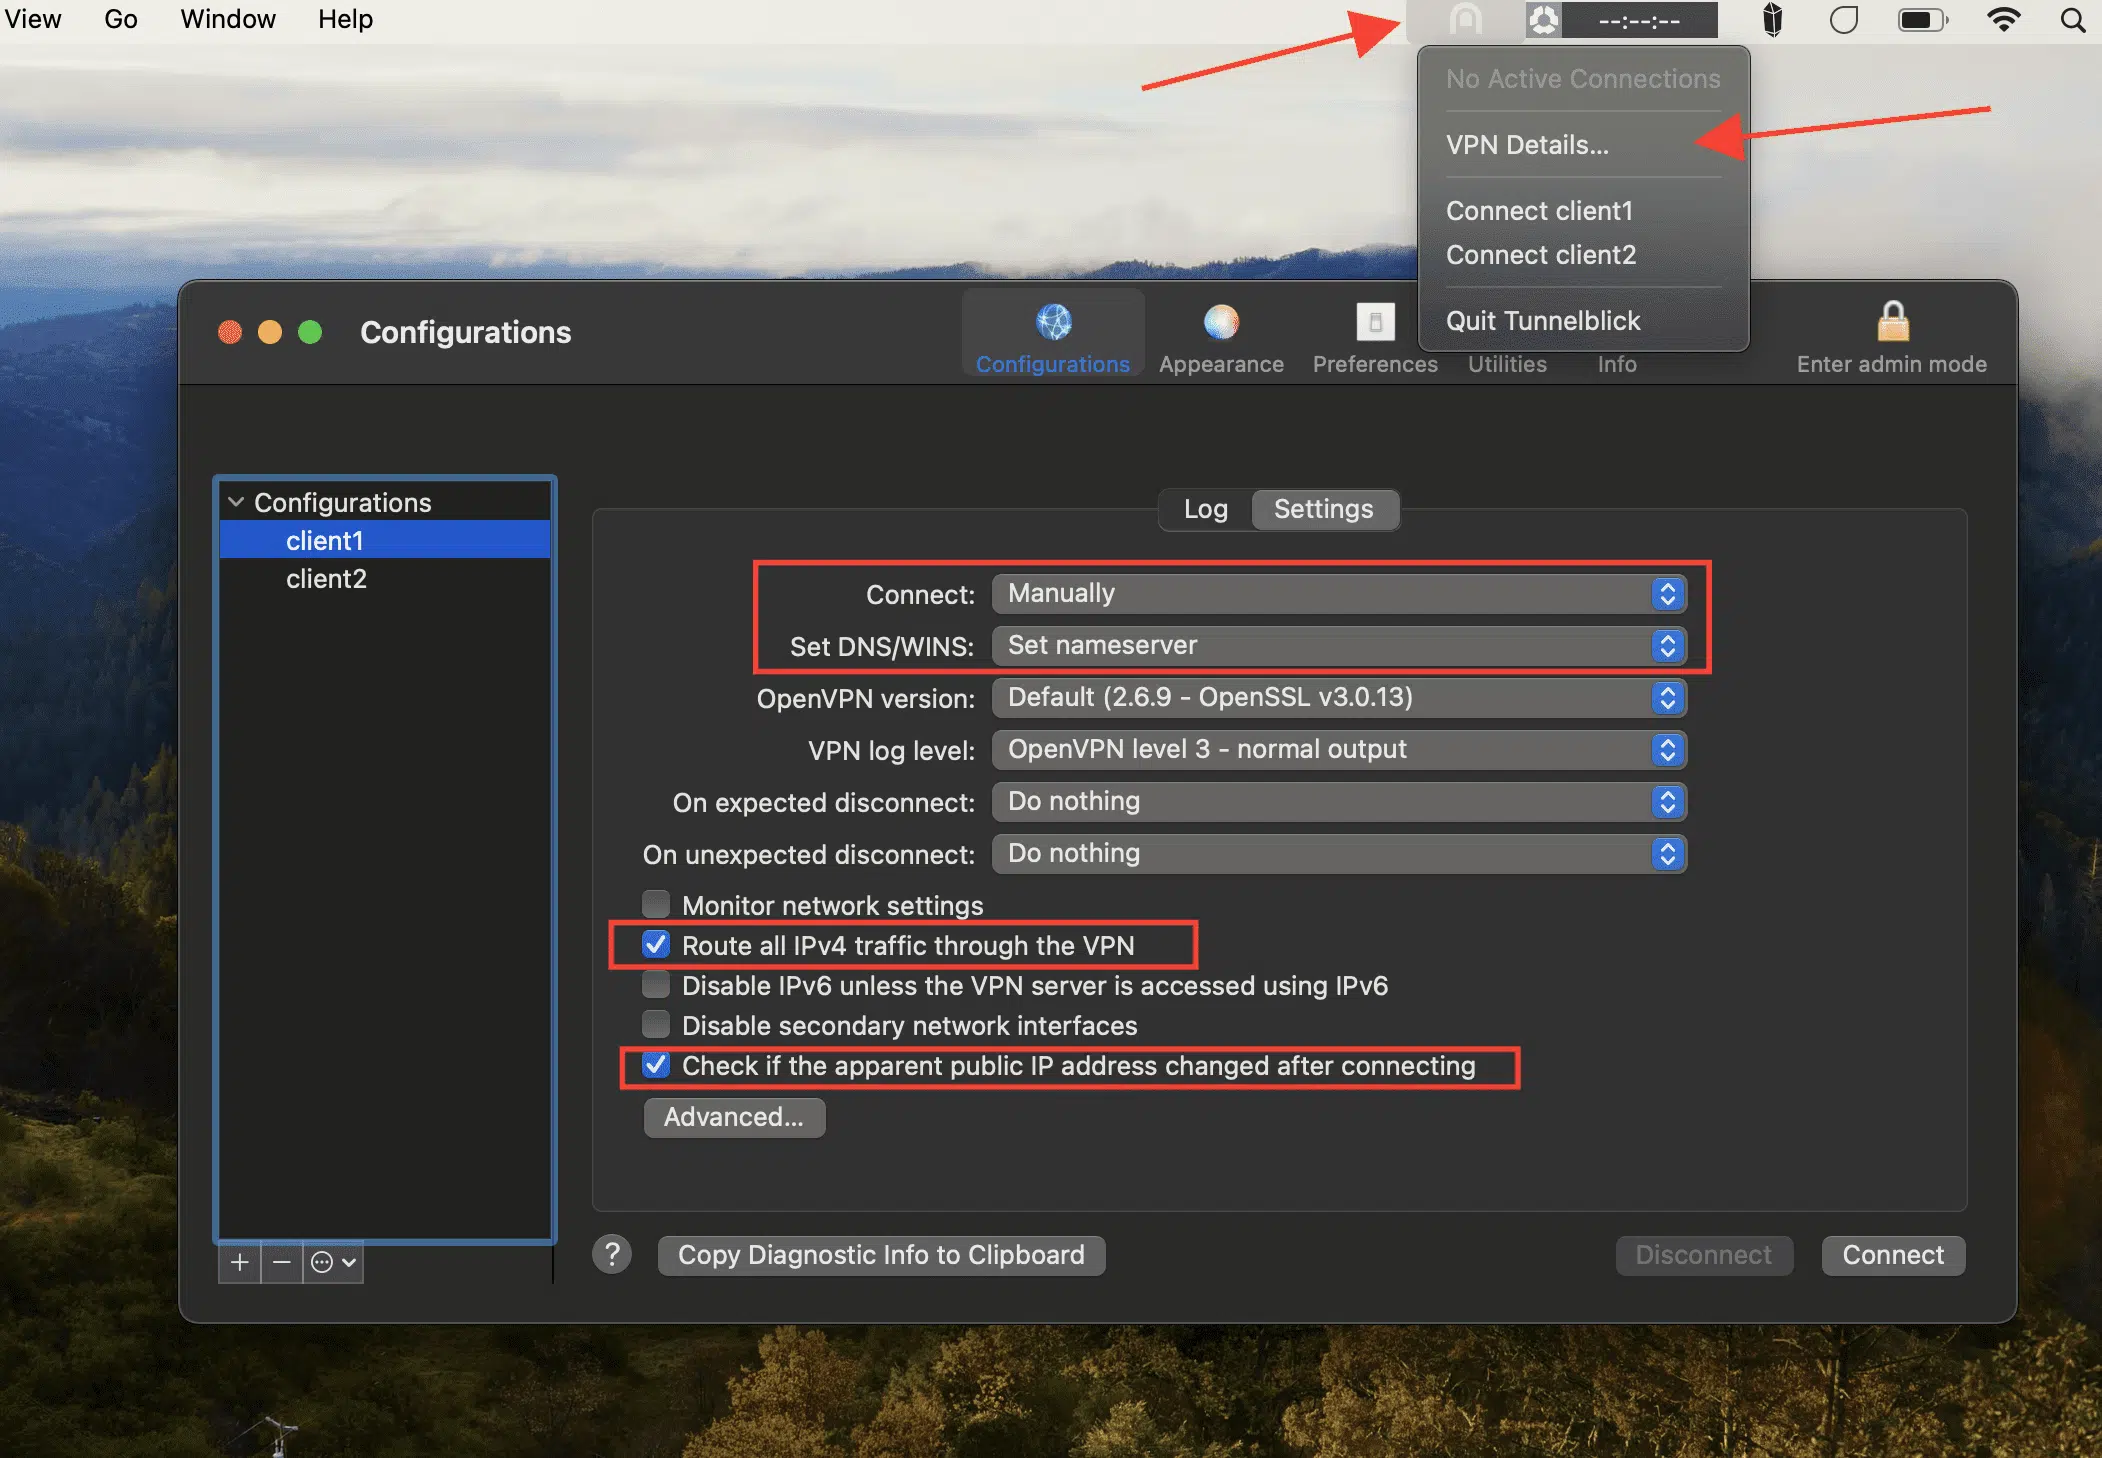
Please, make sure that the options specified in the screenshots are enabled. If it’s so, click on connect. You can connect too from Tunnelblick icon in the menu bar at the top of your screen, just click on Connect client1 menu item to initiate the VPN connection.
Windows
Download the connection file
Your connection file is available via MDR Google Drive link you have received by email or via slack in a private message. Download the zip file, uncompress and save it in the local folder you prefer. This .ovpn file is the client certificate you need for connecting to the VPN in the next steps.
Installing
Download the OpenVPN client application for Windows from OpenVPN’s Downloads page. Choose the appropriate installer version for your version of Windows.
Note: OpenVPN needs administrative privileges to install.
After installing OpenVPN, copy the .ovpn file you downloaded earlier to:
C:\Program Files\OpenVPN\config
When you launch OpenVPN, it will automatically locate the profile and make it available.
You must run OpenVPN as an administrator each time it’s used, even by administrative accounts. To do this without having to right-click and select Run as administrator every time you use the VPN, you must preset this from an administrative account. This also means that standard users will need to enter the administrator’s password to use OpenVPN. On the other hand, standard users can’t properly connect to the server unless the OpenVPN application on the client has admin rights, so the elevated privileges are necessary.
To set the OpenVPN application to always run as an administrator, right-click on its shortcut icon and go to Properties. At the bottom of the Compatibility tab, click the button to Change settings for all users. In the new window, check Run this program as an administrator.
Connecting
Each time you launch the OpenVPN GUI, Windows will ask if you want to allow the program to make changes to your computer. Click Yes. Launching the OpenVPN client application only puts the applet in the system tray so that you can connect and disconnect the VPN as needed; it does not actually make the VPN connection.
Once OpenVPN is started, initiate a connection by going into the system tray applet and right-clicking on the OpenVPN applet icon. This opens the context menu. Select client1 at the top of the menu (that’s your client1.ovpn profile) and choose Connect.
A status window will open showing the log output while the connection is established, and a message will show once the client is connected.
Disconnect from the VPN the same way: Go into the system tray applet, right-click the OpenVPN applet icon, select the client profile and click Disconnect.
Testing Your VPN Connection
Once everything is installed, a simple check confirms everything is working properly. Without having a VPN connection enabled, open a browser and go to DNSLeakTest.
The site will return the IP address assigned by your internet service provider and as you appear to the rest of the world.
Now connect the VPN client and refresh the browser. A completely different IP address should now appear, and this is how you appear to the world.